Showing posts with label Cupcakes. Show all posts

Monday, May 6, 2013

Double Chocolate Strawberry Cupcakes

 IMG_0250blog My friend Krystal is about to welcome her second child in this world, and with a virtual, cupcake-themed baby shower being thrown in her honor, I couldn't resist joining in the fun. You may remember Krystal's first baby shower... not all that long ago! For that shower, I made tostones. As much fun as that was, dessert of any kind is my true calling. Though I'm still too busy to come back to blogging regularly, I stole a few minutes here and there to make this one happen.  IMG_0255blog
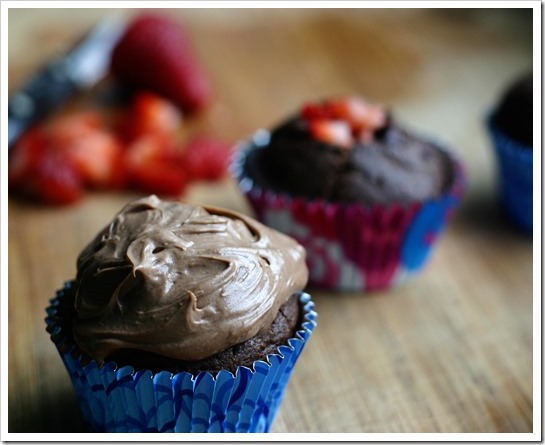
I've been working on renewing my commitment to clean eating lately, and wanted to try coming up with a clean but still delicious cupcake. I've loved this cream cheese frosting recipe for years, and have been waiting for just the right time to share it here. I paired it with an easy chocolate cupcake filled with chocolate ganache and strawberries. Sinful and decadent, in a clean eating sort of way. Congratulations, Krystal, I hope you enjoy these cupcakes, and I can't wait to "meet" your new little one! See the rest of the baby shower at Eva Bakes
 IMG_0260blog

Double Chocolate Strawberry Cupcakes

Double Chocolate Strawberry Cupcakes Source: Adapted from The Way to His Heart, Veronica's Cornucopia, and Clean Eating Magazine, Sept/Oct 2009
Yield: 12 Cupcakes


Ingredients
For the cupcakes:
1 1/2 cups whole wheat pastry flour
1 teaspoon baking soda
1/4 cup cocoa powder (dutch-processed is preferred)
2/3 cup sucanat
1 teaspoon vanilla extract
1 teaspoon white vinegar
6 tablespoons coconut oil, melted
2 egg whites
2/3 cup unsweetened applesauce
1/4 cup water

For the filling:
1 cup chopped bittersweet chocolate
1/2 cup almond milk (or whatever milk/cream you use)
12 strawberries, chopped (you will need fewer if they are large)

For the frosting:
1 cup low-fat cream cheese, at room temperature
6 tablespoons honey
2 tablespoons cocoa powder
1 teaspoon ground cinnamon
1-2 tablespoons water (optional)
Instructions
  1. Preheat the oven to 350 degrees F.  Prepare a cupcake pan with paper liners.
  2. In a large bowl, whisk together the flour, baking soda, and cocoa powder. 
  3. In a medium bowl, whisk together the sucanat, vanilla, vinegar, coconut oil, egg whites, applesauce, and water.
  4. Stir the wet ingredients into the dry ingredients. 
  5. Divide the batter evenly between the 12 cupcake liners.
  6. Bake cupcakes for 13-15 minutes, or until a toothpick comes out clean.  Cool in the pan 10 minutes, then remove and place on a wire rack to finish cooling.
  7. When cupcakes have cooled, prepare the ganache.  Place the chopped chocolate in a small bowl.  Add the milk to a saucepan and bring to a simmer over medium-low heat.  Pour milk over chocolate and let sit 5 minutes.  Slowly begin stirring the chocolate-milk mixture until it is completely smooth. 
  8. To prepare the frosting, add the cream cheese, honey, cocoa powder, and cinnamon to a medium bowl.  Whisk or stir until smooth.  Add water as necessary to attain desired consistency.
  9. To assemble cupcakes, remove center portion of cupcake.  Fill with strawberries and a dollop of ganache.  Top with cream cheese frosting. 


    Tuesday, April 10, 2012

    Glee! Banana Nut Cheerio Cupcakes


    I am so excited that Glee is returning tonight after the late winter break. Last episode left us hanging on the fate of Quinn after her car accident, so I wanted to make Quinn's cupcake for this week.


    IMG_0009c

    It would be an understatement to say Quinn has had a few ups and downs in her time at McKinley High. Her fall from high atop the Cheerios (and school popularity) pyramid due to her teen pregnancy sent her into a bizarre downward spiral in season 3. An attempt to sabotage the custody rights of her daughter's adoptive mother was definitely b-a-n-a-n-a-s. Inspired by A) Quinn's nutty behavior and B) the many flavors of Cheerios cereal, I created Quinn's cupcake.

    IMG_0015c

    I am definitely glad to see that she was able to come full circle in the last episode and regain the status she has longed for: to once again be a Cheerio.

    IMG_0022c

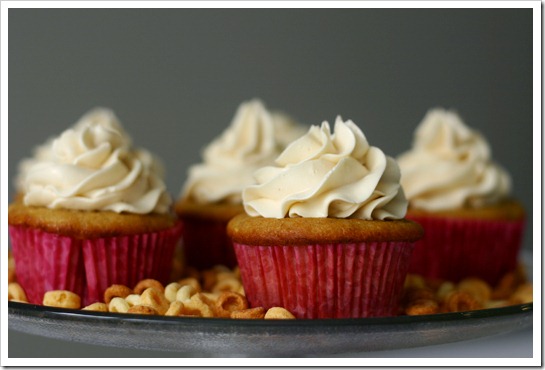
    Quinn's Banana Nut Cheerio cupcake combines cinnamon banana cake with a Cheerio covered peanut butter center, and is topped with caramel swiss meringue buttercream.
    Banana Nut Cheerio Cupcakes

    Banana Nut Cheerio Cupcakes

    Source: Adapted from Apple a Day
    Yield: Serves 24
    Preparation time: 25 minutes
    Cook time: 20 minutes
    Total time: 2 hours, 45 minutes (with cooling time)

    Ingredients
      For the cupcakes:
    • 3/4 cup unsalted butter, at room temperature
    • 3 eggs, at room temperature
    • 2 cups all-purpose flour
    • 1 1/2 teaspoons baking powder
    • 3/4 teaspoon salt
    • 1/4 teaspoon baking soda
    • 1 teaspoon cinnamon
    • 1/2 mashed overripe banana (1 large)
    • 3/4 cup buttermilk
    • 1 teaspoon vanilla extract
    • 1 scant cup sugar

    • For the filling:
    • 2/3 cup powdered sugar
    • 1/2 cup creamy peanut butter
    • 2 tablespoons unsalted butter, at room temperature
    • 1/4 teaspoon vanilla extract
    • 1 1/2 cups crushed peanut butter Cheerios cereal

    • For the buttercream:
    • 8 ounces egg whites (from a carton is fine)
    • 12 ounces sugar
    • 1 1/4 cups unsalted butter, at room temperature
    • 1 teaspoon vanilla extract
    • 3 tablespoons caramel sauce


    Instructions
      For the filling:
    1. In bowl, with mixer on medium speed, mix powdered sugar, peanut butter, butter, and vanilla until blended.
    2. Shape mixture into 24 balls using heaping measuring teaspoons. (Balls will be sticky and don't need to be perfectly shaped.)
    3. Roll in crushed Cheerios cereal. Place balls on waxed paper-lined cookie sheet; set aside.

      For the cupcakes:
    1. Preheat oven to 350 degrees Fahrenheit. Line a muffin tin with 24 paper liners.
    2. In a large mixing bowl, beat butter on medium speed for 30 seconds. Add sugar, 1/4 c. at a time, beating on medium speed until light and fluffy and scraping down sides of bowl. Add eggs, one at a time, scraping down sides of bowl after each addition.
    3. In a medium bowl, stir together flour, baking powder, salt, baking soda, and cinnamon.
    4. In a small bowl, combine banana, buttermilk, and vanilla.
    5. Add in flour and banana mixtures, beginning and ending with the flour, and mix on low speed until just combined.
    6. Fill muffin cups 2/3 full. Insert a Cheerio covered peanut butter ball into the center of the cupcake and push down to cover with batter. Bake for 18-20 minutes or until a toothpick inserted in the middle comes out clean.
    7. Allow to cool completely, then frost with buttercream.

      For the buttercream:
    1. Add egg whites and sugar to a heat-safe bowl. Place bowl over a pot of simmering water and whisk lightly until the mixture reaches 140 degrees F and the sugar is dissolved.
    2. Pour hot whites into a room-temperature bowl and whip with a wire whip until double in volume on medium-high speed. When the mixer stops, the meringue should not move around in the bowl. Meanwhile cut up butter into 2-inch pieces. (The butter should be slightly moist on the outside but cold inside.)
    3. On your mixer, remove the whip and attach the paddle. Add half the butter into the bowl immediately and pulsate the mixer several times until the meringue has covered the butter completely. To pulsate the mixer, turn it on and off in a jerky motion. This forces the butter on the top to the bottom of the bowl. Add the balance of the butter and pulsate mixer several times. Slowly increase the mixer's speed, starting with the lowest speed and increase the speed every 10 seconds until you reach a medium-high speed.
    4. Continue beating until the mixture begins to look light and fluffy. Stop the mixer and scrape the bowl. Reduce speed to low. Add vanilla and caramel and continue to beat on low speed for 45 seconds. Then beat on medium-high speed for an additional 45 to 60 seconds.
    5. Leftover buttercream can be placed in plastic containers with lids and kept in the freezer for up to 3 months. Defrost completely (several hours) and rewhip before using.


      Tuesday, May 24, 2011

      Glee! Star-Berry Cupcakes


      For tonight's season finale (*tear*), I chose to present Rachel's cupcake. I am always sad when the show goes on break or the season ends, but this time I am also excited, as I will have all summer to dream up awesome Gleecakes (thanks, Kelsey!) for the rest of the gang, including Finn, Quinn, Puck, Santana, Brittany, Artie, Sam, Sue, Mr. Schue... maybe even a (crazy)Gleecake for Terri?


      Rachel is an exceedingly driven member of the student body at McKinley High. She wants nothing more in life than to be a star (well, aside from gaining the affections of Finn). She lets nothing stop in her way of getting as much exposure as possible - from always speaking her mind on any Glee club matter, to securing television commercials for the group, to demanding solos in competition.

      CRW_0297c


      Rachel is consistently reminding us that stars are her signature icon, so incorporating stars into her cupcake was a given! As Rachel would most surely attest that she is naturally uber talented, I chose a starfruit, with it's natural star shape, to adorn sparkly buttercream topped cupcakes. However, I also couldn't resist hiding a star inside the cupcake because, really, how much fun is this?!

      CRW_0306c


      CRW_0304c

      Rachel's Star-Berry Cupcake combines vanilla cake with a surprise strawberry star baked inside, topped with strawberry swiss meringue buttercream, silver pearl dust, and sliced starfruit.

      CRW_0313c

      Star-Berry Cupcakes


      Star-Berry Cupcakes

      Source: Vanilla cake reworded from Confections of a Foodie Bride, Strawberry cake slightly adapted from Good Things Catered (inactive blog), Buttercream slightly adapted from The Culinary Life/Garrett McCord and Beantown Baker/epicurious,
      Yield: about 12 cupcakes
      Total time: 4 hours 10 minutes, including 2 hours inactive time


      Ingredients

      For the strawberry cake:

      • 1 1/4 cups cake flour
      • 1/2 teaspoon baking soda
      • 1/8 teaspoon salt
      • 1/4 cup unsalted butter, at room temperature
      • 3/4 cup sugar
      • 1 large egg
      • 2 1/2 tablespoons buttermilk, at room temperature
      • 2 tablespoons oil
      • 1/2 teaspoon pure vanilla extract
      • 1 cup chopped strawberries
      • 1/4 cup freeze dried raspberries, ground fine (optional, for coloring; can use red food coloring instead, if desired)

      For the vanilla cake:

      • 1 1/2 cups cake flour
      • 1 1/2 teaspoons baking powder
      • 1/4 teaspoon salt
      • 1/2 cup unsalted butter, cubed and softened to room temperature
      • 1 cup sugar
      • 2 1/2 large eggs (beat the third egg in a small bowl, use half)
      • 1/2 cup, plus 2 tablespoons buttermilk, at room temperature
      • 2 teaspoons pure vanilla extract

      For the buttercream and decoration:

      • 4 ounces egg whites (from a carton is fine)
      • 6 ounces sugar
      • 10 tablespoons unsalted butter, at room
        temperature
      • 1/2 teaspoon pure vanilla extract
      • 2-4tablespoonspureed strawberries
      • 1 starfruit, sliced thin
      • silver pearl dust

      Instructions

      For the strawberry cake:

      1. Preheat oven to 350 degrees and prepare one 9" or 8" round cake pan by spraying with baking spray. Sift flour, salt, and baking soda in medium bowl. In bowl of mixer, cream butter and sugar until fluffy. Add eggs and mix until combined. Add buttermilk, oil and vanilla until combined. Add flour mixture and stir until just combined. Stir in chopped strawberries and ground freeze dried raspberries (or food coloring, to desired shade of pink/red).
      2. Pour batter into cake pan. Bake for approximately 25-30 minutes, or until a toothpick inserted into the center comes out clean. Cool cake in pan on wire rack for 10 minutes. Remove cake from pan and continue to cook on wire rack until thoroughly cooled.
      3. Wrap well in plastic wrap, and freeze for at least 2 hours to prepare cake for cutting. Once frozen, use a small star cookie or fondant cutter to make star shaped pieces of cake. Use immediately or store, well wrapped, in freezer until you are ready to continue with the cupcakes.

      For the cupcakes:

      1. Preheat oven to 350. Line one muffin/cupcake baking pan with 12 cupcake liners. Set aside.
      2. In a medium bowl, sift together the flour, baking powder, and salt. Place butter in the bowl of a stand mixer, fitted with a paddle attachment. Beat for 3 minutes on medium-high speed until the butter is light and creamy in color. Stop and scrape the bowl. Cream the butter for an additional 60 seconds.
      3. Add the sugar, 1/4 cup at a time, beating 1 minute after each addition. Scrape the sides of the bowl before each addition. Add the eggs one at a time. Reduce the mixer speed. Stir vanilla into the buttermilk. Add the dry ingredients alternately with the buttermilk. Mix just until incorporated. Scrape the sides of the bowl and mix for 15 seconds longer.
      4. Add roughly 2 tablespoonds of batter to each cupcake liner. Place one frozen strawberry cake star in the batter, standing up and all facing the same way. (Remember which way stars are placed, so that decoration added to the top of the cupcakes at the end can signal which way to cut/eat the cake to reveal the star.) Continue to add vanilla batter to each cupcake liner, making sure to cover the stars.
      5. CRW_0285c
      6. Center the pan onto the lower third of the oven and let bake 15-18 minutes. (A skewer test won't work here, since it would go into the pre-baked star cake.)
      7. Let cool completely in the pans. While baking and cooling, prepare buttercream. Frost cupcakes with buttercream, sprinkle with pearl dust, and top with sliced starfruit.

      For the buttercream:

      1. Add egg whites and sugar to a heat-safe bowl. Place bowl over a pot of simmering water and whisk lightly until the muixture reaches 140 degrees F and the sugar is dissolved.
      2. Pour hot whites into a room-temperature bowl and whip with a wire whip until double in volume on medium-high speed. When the mixer stops, the meringue should not move around in the bowl. Meanwhile cut up butter into 2-inch pieces. (The butter should be slightly moist on the outside but cold inside.)
      3. On your mixer, remove the whip and attach the paddle. Add half the butter into the bowl immediately and pulsate the mixer several times until the meringue has covered the butter completely. To pulsate the mixer, turn it on and off in a jerky motion. This forces the butter on the top to the bottom of the bowl. Add the balance of the butter and pulsate mixer several times. Slowly increase the mixer's speed, starting with the lowest speed and increase the speed every 10 seconds until you reach a medium-high speed.
      4. Continue beating until the mixture begins to look light and fluffy. Stop the mixer and scrape the bowl. Reduce speed to low. Add vanilla and 2 tablespoonds of strawberry puree and continue to beat on low speed for 45 seconds. Then beat on medium-high speed for an additional 45 to 60 seconds. Add additional puree, if necessary, to acheive desired color and taste. If frosting gets too soft, powdered sugar can be added to help stiffen it back up.
        Note: Leftover buttercream can be placed in plastic containers with lids and kept in the freezer for up to 3 months. Defrost completely (several hours) and rewhip before using. Storage: Store the icing in an airtight container and freeze for up to 3 months.

      Tuesday, May 17, 2011

      Glee! Gingered Bow Cupcakes

      glee

      Emma is one of my favorite characters on Glee, so I was very excited to make her cupcake this weekend. On the outside, Emma is a reserved, polished, sweetheart of a guidance counselor with a little spunk to go along with her firery red hair. Inside, she wrestles with more complex issues - a battle with OCD and a longing to be loved by the one man who stole her heart.

      emma_pillsbury

      I knew from the start that her cake would be carrot cake, but with her recent proclamation of Gingerhood, a little kick from some ground ginger was definitely in order! The ginger also helps add a level of complexity to the flavor of the cake, to play off Emma's internal struggles. In keeping with Emma's polished exterior, I topped the cake with a tribute to her signature bow blouses and throwback hairstyle - a white fondant bow with curled tails.

      CRW_0175c


      Emma's cupcake combines gingered carrot cake with a delicate cream cheese frosting, topped with a signature bow!

      CRW_0171c

      Gingered Bow Cupcakes


      Source: Slightly adapted from Baking Illustrated

      Yield: about 24 cupcakes

      Total time: 45 minutes


      Ingredients

      • 2 1/2 cups whole wheat pastry flour (12 1/2 ounces)
      • 1 1/4 teaspoons baking powder
      • 1 teaspoon baking soda
      • 1 1/4 teaspoons ground cinnamon
      • 1/2 teaspoon ground nutmeg
      • 1/8 teaspoon ground cloves
      • 2 teaspoons ground ginger
      • 1/2 teaspoons table salt
      • 1 pound medium carrots (6 to 7), peeled
      • 1 1/2 cups evaporated cane juice (10 1/2 ounces)
      • 1/2 cup packed light brown sugar (3 1/2 ounces)
      • 4 eggs (large)
      • 1 1/2 cups safflower oil
      • 8 ounces cream cheese, softened but still cool
      • 5 tablespoons unsalted butter, softened but still cool
      • 1 tablespoon orange juice
      • 1/2 teaspoon vanilla extract
      • 1 1/4 cups powdered sugar (4 1/2 ounces)
      • fondant, for decorations

      Instructions

      1. Wash all bowls, pans, utensils, and equipment in hot, soapy water. Dry thoroughly.
      2. Wash all carrots thoroughly to ensure they are free of pesticides.
      3. Day dream about Will Schuester.
      4. Adjust oven rack to middle position; heat oven to 350 degrees. Line 2 muffin pans with sterilized cupcake wrappers.
      5. Whisk together flour, baking powder, baking soda, cinnamon, nutmeg, cloves, ginger, and salt in medium bowl; set aside.
      6. In food processor fitted with large shredding disk, shred carrots (you should have about 3 cups); transfer carrots to bowl and set aside. Wash food processor components thoroughly with hot, soapy water, then dry pieces and fit bowl with metal blade. Process granulated and brown sugars and eggs until frothy and thoroughly combined, about 20 seconds. With machine running, add oil through feed tube in steady stream. Process until mixture is light in color and well emulsified, about 20 seconds longer. Scrape mixture into large bowl.
      7. Realize you are alone and break down in tears, singing "All By Myself."
      8. Pull yourself together.
      9. Stir in carrots and dry ingredients until incorporated and no streaks of flour remain. Full cupcake wrappers 2/3 of the way and until toothpick or skewer inserted into center comes out clean, about 16-20 minutes, rotating pan halfway through baking time.
      10. Cool cupcakes to room temperature in pan on wire rack. When ready to frost, prepare icing. Try not to pass out while working with cream cheese and butter. Process cream cheese, butter, orange juice, and vanilla in clean food processor workbowl until combined, about 10 seconds, scraping down bowl with rubber spatula as needed. Add powdered sugar and process until smooth, about 10 seconds. Frost cupcakes and top with fondant bow. Have a cupcake to make yourself feel better.
      11. Resume day dreaming about Will Schuester.
        CRW_0166c

        Tuesday, April 26, 2011

        Glee! Blackberry Blackbird Cupcakes

        gleec

        Welcome to the second installment of Glee cupcakes!  I was so excited to discover that it would be a 90 minute episode tonight, that I couldn't wait to get started on the next cupcake.  I seemed to hit it right on the money last week - a diva cupcake for Mercedes paired with an episode with her being a true diva (puppies, anyone?). Seeing the previews for tonight's episode made my pick for this week easy - Kurt!

        glee-kurt

         One of my favorite performances from Kurt is the recent Blackbird, sung after the death of Pavarotti (the Warbler's canary mascot), and that became the inspiration for Kurt's Glee cupcake. I used my favorite vanilla bean cake recipe for the cake, because I knew they bake up with a flat top that would be perfect for the design I had in mind.

        CRW_0016c

        CRW_0021c

        Kurt's Blackberry Blackbird Cupcake combines vanilla bean cake, blackberry filling, and lime swiss meringue buttercream. A nest of candied lime peel holds a fresh blackberry on top of a beautiful rose of buttercream.

        CRW_0029c

        Blackberry Blackbird Cupcakes


        Blackberry Blackbird Cupcakes

        Source: Cake reworded from Confections of a Foodie Bride,
        Buttercream slightly adapted from The Culinary Life/Garrett McCord and Beantown Baker/epicurious,
        Candied lime peel reworded from Martha Stewart
         
        Yield: about 16 cupcakes
        Total time: 1 hour 10 minutes

        Ingredients

        For the cake:

        • 1 1/2 cups cake flour
        • 1 1/2 teaspoons baking powder
        • 1/4 teaspoon salt
        • 1/2 vanilla bean, split and scraped
        • 1/2 cup unsalted butter, cubed and softened to room temperature
        • 1 cup sugar
        • 2 1/2 large eggs (beat the third egg in a small bowl, use half)
        • 1/2 cup, plus 2 tablespoons buttermilk, at room temperature
        • 1 teaspoon pure vanilla extract
        • 1/2 cup blackberry jam
        • 16 fresh blackberries, rinsed and dried

        For the buttercream:

        • 8 ounces egg whites (from a carton is fine)
        • 12 ounces sugar
        • 1 1/4 cups unsalted butter, at room temperature
        • 1 teaspoon pure vanilla extract
        • juice of one lime

        For the candied lime peel:

        • 1 lime
        • 1 1/2 cups sugar
        • 1 cup water
        • superfine sugar, for coating

        Instructions

        For the cake:

        1. Preheat oven to 350. Line two muffin/cupcake baking pans with 16 cupcake liners. Set aside.
        2. In a medium bowl, sift together the flour, baking powder, and salt. Place butter in the bowl of a stand mixer, fitted with a paddle attachment. Split and scrape the vanilla pod into the butter, discard pod (or reserve for another use). Beat for 3 minutes on medium-high speed until the butter is light and creamy in color. Stop and scrape the bowl. Cream the butter for an additional 60 seconds.
        3. Add the sugar, 1/4 cup at a time, beating 1 minute after each addition. Scrape the sides of the bowl before each addition. Add the eggs one at a time. Reduce the mixer speed. Stir vanilla into the buttermilk. Add the dry ingredients alternately with the buttermilk. Mix just until incorporated. Scrape the sides of the bowl and mix for 15 seconds longer.
        4. Divide the batter evenly among the prepared pans. Lift up and drop each pan onto the counter top a couple of times to burst any air bubbles and allowing the batter to settle. Center the pans onto the lower third of the oven and let bake 15-18 minutes or until a skewer inserted in the center comes out with moist crumbs attached.
        5. Let cool completely in the pans. While baking and cooling, prepare buttercream and candied lime peel.

        For the buttercream:

        1. Add egg whites and sugar to a heat-safe bowl. Place bowl over a pot of simmering water and whisk lightly until the muixture reaches 140 degrees F and the sugar is dissolved.
        2. Pour hot whites into a room-temperature bowl and whip with a wire whip until double in volume on medium-high speed. When the mixer stops, the meringue should not move around in the bowl. Meanwhile cut up butter into 2-inch pieces. (The butter should be slightly moist on the outside but cold inside.)
        3. On your mixer, remove the whip and attach the paddle. Add half the butter into the bowl immediately and pulsate the mixer several times until the meringue has covered the butter completely. To pulsate the mixer, turn it on and off in a jerky motion. This forces the butter on the top to the bottom of the bowl. Add the balance of the butter and pulsate mixer several times. Slowly increase the mixer's speed, starting with the lowest speed and increase the speed every 10 seconds until you reach a medium-high speed.
        4. Continue beating until the mixture begins to look light and fluffy. Stop the mixer and scrape the bowl. Reduce speed to low. Add vanilla and lime and continue to beat on low speed for 45 seconds. Then beat on medium-high speed for an additional 45 to 60 seconds.
          Leftover buttercream can be placed in plastic containers with lids and kept in the freezer for up to 3 months. Defrost completely (several hours) and rewhip before using. Storage: Store the icing in an airtight container and freeze for up to 3 months.

        For the candied lime peel:

        1. Peel lime with peeler from top to bottom. Using a sharp knife, carefully remove any thick white pith from lime peel. Cut peel into thin strips.
        2. Bring a medium pot filled with water to a boil over high heat. Prepare an ice-water bath. Add lime peel to boiling water and cook for 1 minute. Using a slotted spoon, transfer lime peel to ice-water bath to cool. Repeat process.
        3. Heat sugar and 1 cup water in a medium saucepan over medium-high heat until sugar is dissolved. Drain lime peel and add to saucepan; cook, stirring occasionally, for 5 minutes. Using a slotted spoon, transfer lime peel to a wire rack set over parchment paper to drain. Toss with superfine sugar to coat. Store candied lime peel in an airtight container up to 3 days.

        Assembly

        1. Prepare cupcakes for filling with the cone method: Using a small, sharp knife, cut a cone out of the center of each cupcake. Fill the cupcake with a rounded teaspoon of blackberry jam. Remove the tip of the cone (to leave room for the filling) and replace the top to the cupcake. Cake is a terrible thing to waste, so be sure to enjoy all those little pieces you cut off!
        2. To make rose design, fit a pastry bag with a large star tip, such as Wilton # 1M. Fill bag with buttercream, and pipe onto cucpcake in a circular motion, starting in the center of the cupcake and moving outward.
        3. Top with fresh blackberry and pieces of candied lime peel.
        CRW_0004c

        Tuesday, April 19, 2011

        Glee! Choco-Diva Cupcakes

        gleec

        I was in the mood to bake cupcakes over the weekend, but found myself without a cause. Certainly one should be able to make cupcakes just for the heck of it, but I thought for a moment about what I could celebrate with cupcakes, and quickly thought of Glee! My favorite show returns with new episodes this week, after a hiatus during the month of March. I love everything about this show - the music, the satire, the one-liners, the drama, and most of all, the insane talent.  Fellow Gleek Krystal suggested I make some Glee themed cupcakes, and got me started with a few great suggestions!

        glee_mercedes

        I had already planned to make chocolate cupcakes, so Krystal's suggestion of a choco-diva cupcake for Mercedes jumped out at me. Mercedes is a sassy and confident member of the glee club, with the desire to be in the limelight and the talent to back it up. Befitting of her large personality, I created an over the top cupcake with definite style and intense flavors.

        CRW_0043c
        The Mercedes Choco-Diva Cupcake combines coconut chocolate cake, coconut cream filling, and almond buttercream, with caramel and chocolate ganache drizzled on top. For extra flair, the frosting is piped in a ruffled design, inspired by Cook like a Champion.
         
        CRW_0049c

        Note: I am on a dairy-free diet for the time being, so I made the vegan chocolate cupcakes below (the perfectly domed tops at Oh She Glows convinced me I need to try her recipe - and it did not dissappoint!), but you can use your favorite chocolate cake recipe.

        Choco-Diva Cupcakes


        Choco-Diva Cupcakes
        Source: Cake and Frosting adapted from Oh She Glows, Coconut Cream filling adapted from here, Caramel and Chocolate Ganache Glaze adapted from Baking: From My Home To Yours
        Yield: 12 cupcakes
        Total time: 2 hours, 30 minutes (make the caramel first to cut down on idle time!)


        Ingredients

        For the cupcakes:

        • 1 cup non-dairy milk, (regular milk is fine if you aren't sensitive to dairy or following a vegan diet)
        • 1 cup evaporated cane juice
        • 1/3 cup extra virgin olive oil
        • 1 tablespoon apple cider vinegar
        • 1 tablespoon pure vanilla extract
        • 1/2 teaspoon pure almond extract
        • 1 1/2 cups whole wheat pastry flour
        • 1/3 cup cocoa powder
        • 1 teaspoon baking soda
        • 3/4 teaspoon kosher salt
        • 1/2 cup unsweetened shredded coconut, divided

        For the frosting:

        • 1/2 cup Earth Balance buttery stick or equivalent, at room temperature
        • 3 cups powdered sugar, sifted
        • 1/4 teaspoon kosher salt
        • 1 teaspoon pure almond extract
        • 3 tablespoons non-dairy milk, (regular milk is fine if you aren't sensitive to dairy)

        For the filling:

        • 1 can coconut milk (do not use light milk)
        • 1/2 teaspoon pure vanilla extract
        • 2 tablespoons evaporated cane juice, or sugar

        For the caramel:

        • 1/2 cup evaporated cane juice, or sugar
        • 1 tablespoon water
        • 1 teaspoon agave nectar, or light corn syrup
        • 1/4 cup reserved coconut cream (from filling)
        • 1 teaspoon Earth Balance buttery stick or equivalent, at room temperature

        For the chocolate ganache glaze:

        • 2 ounces bittersweet or semisweet chocolate chips
        • 1/4 cup reserved coconut cream (from filling)
        • 1 tablespoon water
        • 1 tablespoon evaporated cane juice, or sugar

        Instructions

        One Day Ahead: Identify which end of the can of coconut milk you'll open with the can opener, and place it that-side-down in the refrigerator. It's best to chill it at least 24 hours, as this will allow the cream to separate and rise to the top.

        For the cupcakes:

        1. Preheat oven to 350F and line a cupcake pan with cupcake liners. With an electric or stand mixer, beat together the non-dairy milk, oil, sugar, apple cider vinegar, vanilla, almond extract in a large bowl. Beat on medium speed for one to two minutes.
        2. Sift together the flour, cocoa powder, baking soda, and salt. Slowly add the flour mixture to the wet ingredients, mixing until all the clumps are gone. Stir in coconut, reserving 2 tablespoons.
        3. Pour batter into prepare pan (it will be thin), about 2/3 full for each. Sprinkle tops of each with reserved shredded coconut (they will self-toast in the oven and add another great dimension to these cupcakes!).
        4. Bake for 22 minutes at 350 degrees F, or until a toothpick inserted in the center comes out clean. Allow cupcakes to cool completely in the pan.

        For the frosting:

        1. In a mixing bowl, beat Earth Balance (or equivalent) with an electric or stand mixer for 2-3 minutes. Add milk, vanilla, and salt and beat and additional minute.
        2. Slowly add the powdered sugar, 1 cup at a time. Beat until fully combined, then another 5 minutes more. Add additional milk, a little at a time, if necessary to reach desired consistency.

        For the filling:

        1. Open can of refrigerated coconut milk. Pour off the clear/milky coconut water (it will be on the top if you chilled the can open-side-down). This can be saved for smoothies or added to juice.
        2. Scoop the cream out of the can and into a small bowl (about 1 1/2 cups).
        3. Combine 1 cup of coconut cream, vanilla and cane juice in a small bowl and whisk to combine. Refrigerate until you are ready to assemble the cupcakes.

        For the caramel:

        1. Add cane juice, water and agave nectar in a small heavy bottomed saucepan and stir to combine. Bring to a boil over medium-high heat, without stirring. Let boil until a nice amber color is acheived, about 5-10 minutes. It's easiest to check the color of the sugar by dropping a small amount on a white plate.
        2. Once at the desired color, remove the pan from the heat, and stand back to add the coconut cream and butter (it will spatter). Stir the caramel to calm it down, then pour into a heatsafe bowl.
        3. Let caramel cool for one hour before topping cupcakes.

        For the chocolate ganache glaze:

        1. Add the chocolate to a medium heatsafe bowl.
        2. Add the coconut cream, water and cane juice to a small saucepan and stir to combine. Bring to a boil over medium heat.
        3. Pour cream mixture over chocolate, and let sit for 30 seconds.
        4. Using a whisk or spatula, slowly stir the chocolate/cream mixture with slow, concentric circles starting in the center. Stir until all the chocolate is melted and smooth.

        Assembly! (thought you'd never get here, eh?)

        1. Prepare to fill the cupcakes - the cone method works best here. Using a small, sharp knife, cut a cone out of the center of each cupcake. Fill the cupcake with coconut cream. Remove the tip of the cone (to leave room for the filling) and replace the top to the cupcake. Cake is a terrible thing to waste, so be sure to enjoy all those little pieces you cut off!
        2. To apply the ruffled frosting, fill a pastry bag fitted with a leaf tip (such a Wilton #104) with buttercream. I find that placing the cupcake on a small piece of foil makes it easy to turn while applying frosting. With the fat end of the tip facing out, pipe a circle of frosting around the edge of the cupcake, using a back and forth, overlapping motion. Fill in the center of the frosting ring to leave an even layer for the next level of frosting. Complete the second layer using the same back and forth overlapping motion, with a slightly smaller circle. Again, fill in the center so it is one even layer of frosting. Complete one more circle, smaller yet, for the third layer. Move the tip and and down, while turning the cupcake, to make a crown of frosting on top.
        3. Using a large spoon, drizzle caramel and chocolate ganache glaze over the cupcakes.

          Friday, December 11, 2009

          Winter Cranberry Cupcakes

          I went a little crazy a few weeks ago when cranberries went on sale, and I bought 7 (7!) bags that I promptly stuffed in my freezer. I was so happy thinking I'd be able to make cranberry-whatever all through the summer. Then I realized we are likely moving well before then. Whoops!  No time like the present, apparently, to work down the stock I just created!
          IMG_0043c

          First on my list was this recipe for cranberry white chocolate cupcakes. Cranberries and white chocolate are two of my greatest loves, so I knew this would be a great combo. I almost left the white chocolate bits out of the batter, and ultimately I think it would be better without them, especially with the white chocolate frosting. For the snowflakes, I melted some white chocolate, then added it to a ziplock bag. On a piece of parchment paper, I traced some snowflake designs, then flipped the parchment over. I cut a small tip off the end of the bag, and piped white chocolate, following the snowflake designs, onto the parchment. I let them set for about 20 minutes while I frosted the cupcakes, then carefully lifted each one off the parchment with an off-set spatula.

          These cupcakes are fantastically delicious with the cranberries providing just the right amount of tart, and the hint of orange play very well with the cranberry. Perfect for any winter gathering!

          IMG_0046c

          White Chocolate-Cranberry Cupcakes
          Source: Culinography (adapted from Baker’s Chocolate)
          Yield: 18-20 cupcakes
          • 6 (1 ounce) squares white baking chocolate
          • 3/4 cup unsalted butter, softened
          • 1 cup firmly packed brown sugar
          • 1/2 cup granulated sugar
          • 4 eggs
          • 1 tablespoon grated orange peel
          • 3 tablespoons orange juice2 cups flour
          • 2 teaspoons baking powder
          • 1 1/2 cups fresh cranberries
          Preheat oven to 350 degrees. Line two cupcake tins with liners. Chop 6 of the chocolate squares and set aside. Beat butter and sugars in large bowl with electric mixer on medium speed until light and fluffy. Add eggs, orange peel, and orange juice; mix well. Add flour and baking powder; beat until well blended. Fold in chopped chocolate and the cranberries. Bake approximately 18-20 minutes (mine took more like 25) or until a toothpick inserted near the center comes out clean. Remove cupcakes to wire rack. Cool completely.

          White Chocolate Buttercream
          Source: Cupcake Shop
          • 7 ounces white chocolate, chopped
          • 1 stick (1/2 cup) unsalted butter, room temperature 
          • 1 package (8 ounces) philly cream cheese 
          • 1 teaspoon vanilla 
          • ~2 cups powdered sugar
          1. In a heat proof bowl over a pan of simmering water, gently melt the white chocolate. Allow to cool for 10 minutes or so.
          2. Using an electric mixer, beat the butter at medium speed until creamy. Add the cream cheese and beat until combined.
          2. Beat in the melted white chocolate.
          3. Add the vanilla and 2 cups of powdered sugar and beat at low speed, scraping the sides and bottom of the bowl, until light and fluffy. Add more powdered sugar to arrive at the consistency and sweetness you like. 2 cups worked for me.

          Monday, September 28, 2009

          BB: Birthday Sheet Cake

          This month, we had two cake recipes for Barefoot Bloggers. I was happy to make Beatty's Chocolate cake and share it with friends, but I didn't have an occasion for the other recipe, Birthday Sheet cake. I decided to take the recipe and try to make a clean version. It was quite a challenge, as I had to switch out butter, flour, eggs, and sugar - all the things that make cake great! Armed with knowledge I've picked up from reading Clean Eating Magazine, I set out to twist this recipe and make some clean cupcakes. (I should note that I have no idea if cornstarch is clean or not, but I kept that ingredient in the recipe).

          In my first attempt, I used whole wheat pastry flour to replace the white flour, and sucanat to replace the sugar. The results were delicious, but nowhere near a white cake. The sucanat is closed to brown sugar than white, so it imparted a nice molasses flavor to the cake. I think my baking soda was a little old, causing a failure to rise properly. I blended some cream cheese, agave nectar, and lemon zest together for an impromptu frosting and it was fantastic! The recipe ended up being a start to a great carrot or apple spice cake - so I can't wait to experiment further!


          For my second attempt, I set out to try and correct the recipe by switching to spelt flour and agave nectar for a lighter flavor. I got a little confusing in the grocery store, since it was my first time buying spelt flour. I got what was labeled as spelt flour, and probably should have gotten white spelt flour. The regular spelt flour looks a lot like the whole wheat pastry flour, but I was trying to go for something lighter than that. Maybe next time I'll get the white spelt flour and see how the cupcakes turn out then! Using agave nectar has it's own complications, since it's a liquid about the consistency of thin honey. To compensate, I needed to increase the amount of dry ingredients by I'm-not-sure-how-much. Luckily, my first attempt at making cupcakes with agave nectar turned out great! Armed with new baking soda, my cupcakes had gorgeous high domes. I tried a few different levels of batter in the muffin tin, and ultimately preferred the ones that were 2/3 full. Like others that made the original recipe, these are very dense cupcakes.

          I wasn't sure what kind of frosting to make for these. My original vision was to use a chocolate cream cheese frosting that I'd seen in Clean Eating Magazine, but in tasting the cupcakes, that just didn't seem right. Then I tried a peanut butter cream cheese, but that wasn't right either. I ended up using the same simple frosting I'd made for the first batch of cupcakes, and it was a perfect, light complement to the dense cake.


          If you aren't as crazy as I am, and want a normal sheet cake, see the recipe here, and see how the other Barefoot Bloggers fared with the recipe, here. Otherwise....

          My-First-Attempt-At-A-Clean-Cupcake
          Makes 12 cupcakes
          • 2 tablespoons canola oil
          • 1/2 cup agave nectar
          • 3 egg whites
          • 1 tablespoon ground flaxseed
          • 2 ounces greek yogurt
          • 1/2 tsp vanilla extract
          • 1 1/3 cup spelt flour
          • 1 3/4 tablespoons cornstarch
          • 1/3 teaspoon salt
          • 1/2 teaspoon baking soda
          1. Add oil, agave nectar, egg white, flaxseed, yogurt, and vanilla extract in a medium bowl. Stir to combine.
          2. In a separate bowl, combine flour, cornstarch, salt and baking soda. Whisk to combine.
          3. Add dry ingredients to the wet ingredients, combine thoroughly.
          4. Line muffin tin with cupcake liners. Fill liners 2/3 full with cupcake batter. Bake at 350 for 18-24 minutes, until a toothpick inserted in the center comes out clean. Cool a few minutes in the pan, then remove and cool on a wire rack before frosting.

          Simple Cream Cheese Icing
          • 8 ounces low fat cream cheese, softened
          • 8 teaspoons agave nectar
          • 1 tsp lemon zest
          1. Combine all ingredients in a bowl and beat until smooth. Spread on cooled cupcakes.

          Nutritional Information:
          (Per cupcake, assumes 1 batch of frosting spread equally between 12 cupcakes)
          Calories: 220
          Fat: 7.1 g
          Sat Fat: 3.1 g
          Cholesterol: 13.6 mg
          Sodium: 183 mg
          Potassium: 83 mg
          Carbohydrate: 34.4 g
          Fiber: 3.3 g
          Sugar: 20 g
          Protein: 4.8 g

          Monday, August 17, 2009

          S'mores Cupcakes

          If you are looking for a cupcake to impress - this is your cupcake. I made these for a party, and everyone was floored by them (they might have even beat out the oreo cupcakes!). These are some pretty outstanding cupcakes, for reasons that escape me still. It must be divine intervention because, well, these are divine!


          Even though it's a two step process, the cupcakes actually come together easily. My favorite part is the chocolate batter - after adding the water, it is actually pourable! I just loaded up my big measuring cup and poured the batter into the cupcake liners. So easy! I did end up having a problem with the frosting. I wanted a beautiful piped tower of marshmallow buttercream atop the cupcake, but I just couldn't get it stiff enough and ended up with marshmallow oozing down the sides. I suppose that is more true to form for a cupcake modeled after s'mores, and the party guests didn't seem to mind one bit.


          One final note, I pitty those that do not have access to marshmallow fluff. This stuff is heaven on top of a mug of hot chocolate in the winter! I didn't expect to see it out here in the midwest, but a local grocery store, through some miracle, had it in stock!


          S’mores Cupcakes
          Source: Domestic Pursuits
          Yields 30 cupcakes

          For the graham crust:
          1/4 cup sugar
          1 1/2 cups graham cracker crumbs (from about 20 squares)
          1/3 cup unsalted butter, melted
          1/2 - 1 cup bittersweet chocolate chips

          For the cupcakes:
          2 cups sugar
          1 3/4 cups all-purpose flour
          3/4 cup cocoa powder
          1 1/2 tsp baking powder
          1 1/2 tsp baking soda
          1 tsp salt
          2 eggs
          1 cup milk
          1/2 cup vegetable oil
          2 tsp vanilla extract
          1 cup boiling water

          1. Heat oven to 350°F. Grease muffin cups or line with paper liners.
          2. Combine 1/4 cup sugar,graham cracker crumbs and melted butter in a small bowl. Spoon 1 tablespoon of graham cracker mix into the bottom of each muffin cup. Press crumbs firmly, using the bottom of a small glass. Save the remaining mixture for topping. Top graham cracker mix with several bittersweet chocolate chips.
          3. Bake graham mixture for about five minutes, or until the edges are golden brown. Remove from oven and set aside.
          4. Stir together sugar, flour, cocoa, baking powder, baking soda and salt in medium bowl.
          5. In a large bowl, combine eggs, milk, oil and vanilla. Stir until well blended.
          6. Add flour mixture to large bowl and beat on medium speed of mixer 2 minutes. Stir in boiling water (batter will be thin). Pour batter into prepared pans. Fill prepared muffin cups 3/4 full with batter (about 1/4 cup). Sprinkle batter with small amount of remaining graham cracker mixture.
          7. Bake 22 to 25 minutes. Cool completely, then frost.

          Marshmallow Buttercream Frosting
          Source: Hello, Cupcake! via Heather Drive

          Ingredients:
          - 1 container (16 oz.) Marshmallow Fluff
          - 3 sticks unsalted butter, softened and cut into 1-inch pieces
          - 1 tsp. vanilla extract
          - 1/2 cup confectioner's sugar, plus additional sugar, if necessary

          Directions:
          1. Spoon the Marshmallow Fluff into a large bowl. Beat with an electric mixer on low.

          2. Gradually add the butter pieces, beating well after each addition, until smooth.

          3. Add the vanilla extract and the confectioner's sugar. Scrape the bowl well to incorporate. Add more confectioner's sugar, if necessary, to adjust the texture.

          Sunday, June 28, 2009

          Chocolate Peanut Butter Cupcakes with Whipped Peanut Butter Cream Cheese Frosting


          Whew! Long title! My best friend and her mom found these cupcakes on the Good Housekeeping website and suggested I make them. My husband came home that day and mentioned that his coworker was having a party on Saturday - perfect! The GH recipe calls for a plain buttercream frosting, but thought it needed a little something more. I asked around and got some suggestions, and when someone said whipped peanut butter cream cheese frosting, I was SOLD!

          I did a little googling to get a general idea of proportions, then threw some together for a wonderfully creamy, cream cheese-y, peanut buttery delight! Despite overbaking them a tad, the cupcakes were delicious and not overwhelming on either the chocolate or peanut butter flavor. I did, however, get a pocket of air above the peanut butter ball inside each one. I remedied this by poking through the top of the cupcake with the decorating tip, filling that space with frosting, then piping the swirls on top.


          Chocolate Peanut Butter Cupcakes with Whipped Peanut Butter Cream Cheese Frosting

          Cupcake recipe from Good Housekeeping
          Yield: 24 cupcakes

          For the filling and cupcakes:
          ~2/3 cup confectioners' sugar
          ~1/2 cup creamy peanut butter
          ~10 tablespoons (1 1/4 sticks) butter or margarine, softened
          ~1 1/4 teaspoons vanilla extract
          ~1 2/3 cups all-purpose flour
          ~3/4 cup unsweetened cocoa
          ~1 teaspoon baking soda
          ~1/2 teaspoon salt
          ~1 cup sour cream
          ~2 tablespoons milk
          ~1 1/2 cups granulated sugar
          ~2 large eggs

          For the frosting:
          ~8 oz. cream cheese, at room temperature
          ~4 tablespoons butter, softened
          ~1/2 cup peanut butter
          ~3 1/4 cups powdered sugar
          ~1 cup cool whip

          1. Prepare Filling: In bowl, with mixer on medium speed, mix confectioners' sugar, peanut butter, 2 tablespoons butter, and 1/4 teaspoon vanilla until blended. Shape mixture into 24 balls using heaping measuring teaspoons. (Balls will be sticky and don't need to be perfectly shaped.) Place balls on waxed paper-lined cookie sheet; set aside.

          2. Preheat oven to 350 degrees F. Line 24 standard muffin-pan cups with fluted paper liners.

          3. Prepare Cupcakes: On waxed paper, combine flour, cocoa, baking soda, and 1/2 teaspoon salt. In 2-cup liquid measuring cup, mix sour cream, milk, and remaining vanilla; set aside. In large bowl, with mixer on low speed, beat granulated sugar and remaining 8 tablespoons butter just until blended. Increase speed to high; beat 1 minute. Reduce speed to low; add eggs, 1 at a time, beating well after each addition. Beat 1 to 2 minutes more or until light and fluffy. Add flour mixture alternately with sour cream mixture, beginning and ending with flour mixture. Beat just until ingredients are combined, occasionally scraping bowl with rubber spatula.

          4. Spoon 1 heaping measuring tablespoon batter into each muffin-pan cup. Drop 1 peanut butter ball in center of each cup and top with another heaping tablespoon batter. Bake cupcakes 25 to 28 minutes or until toothpick inserted in cupcake comes out clean. (I baked mine for 23 minutes and they were over-done, so watch them carefully!) Immediately remove cupcakes from pans and cool completely on wire rack.

          5. When cupcakes are cool, prepare frosting: In large bowl, with mixer on medium-low speed, beat butter, cream cheese, and peanut butter until smooth and blended. Add powdered sugar slowly, incorporating fully after each addition. Add cool whip and beat until smooth and creamy. Frosts cupcakes.