Tuesday, August 31, 2010

Sausage and Grilled Vegetable Penne

After describing last week's grilled sausage and pasta dish to my husband, his reply was "and then you are going to add pasta sauce?" I explained that no, I wouldn't add pasta sauce, but that the lemon juice/pasta water would create a light sauce. He seemed disappointed by this prospect, although he ended up enjoying the dish.

This weekend we were having some guests for dinner, so when looking for inspiration, I found another sausage/pasta/vegetable dish that would take the addition of some red sauce quite well. The meal turned out great and I was happy to prepare my husband what he had really wanted!

IMG_0012c

Sausage and Grilled Vegetable Penne
Source: Slight adapted from Melissa d'Arabian
Serves: 4
  • 1 sweet onion, cut into wedges
  • 1 medium zucchini, sliced in 1/2 lengthwise and then into strips about 3/4" thick
  • 1 red bell pepper, cheeks and seeds removed, sliced into long strips about 3/4" thick
  • 1/2 pound button mushrooms, stemmed and sliced in half
  • 2 1/2 tablespoons olive oil, divided
  • Kosher salt and freshly ground black pepper
  • 1/2 pint grape tomatoes, washed, dried, sliced in half
  • 4 sweet or hot chicken Italian sausages, thinly sliced or casings removed
  • 12 ounces whole-grain penne
  • about 16-20 ounces pasta sauce 
  • Freshly grated Parmesan, for garnish

Preheat the grill and a grill pan to medium, about 400-450 degrees F. 

In a bowl, toss all the vegetables, except the tomatoes, with oil. Season with salt and pepper, to taste. Add vegetables to grill pan and cook until caramelized, turning vegetables halfway through the cooking time.  Meanwhile, cook pasta according to package directions, and warm the pasta sauce. 

Add the sausage to the grill and cook until heated through, for fully cooked sausage.  Uncooked sausage will take longer, about 20 minutes.  Once the vegetables and sausage are cooked, cool slightly, then coarsely chop. Add vegetables, sausage, pasta and sauce to a large bowl and toss to combine.  Season with salt and pepper, to taste, and serve topped with Parmesan.

Wednesday, August 25, 2010

Honey Mustard Chicken Sandwich

My husband was on his own for dinner one night, and rather than do the usual BBQ or Franks-doused grilled chicken, I was impressed to find that he branched out and tried something new. My first clue that this had happened was in the sink when I got home - dirty measuring cups. My heart nearly stopped at the sight of them, because my husband never, and I mean never, formally measures anything when cooking. His inspiration came from none other than the bottle of mustard in the fridge. Combining two things he loves - mustard and ranch dressing - he knew he would love it. I was surprised, yet again, to find that I liked it just as much! The next time he wanted to make it, I suggested we change up the recipe a little, and turn it into honey mustard chicken sandwiches. He loved the idea and we both loved the results.

IMG_0126c

Tangy Honey Mustard Chicken Sandwiches
Source: Adapted from French's mustard

2/3 cup ranch dressing
1/3 cup classic yellow mustard
1/4 cup honey
4 medium boneless chicken breasts
rolls of your choice (we like Arnold sandwich thins)
sliced tomato
lettuce

Mix dressing, mustard, and honey. Pour 2/3 cup of sauce over chicken and marinate in the refrigerator for 30 minutes.

Grill chicken over medium heat for 10 to 12 minutes, or until cooked through. Serve chicken on rolls with lettuce, tomato, and reserved mustard sauce, as desired.

Monday, August 23, 2010

Grilled Sausage with Olives, Capers, and Summer Vegetables

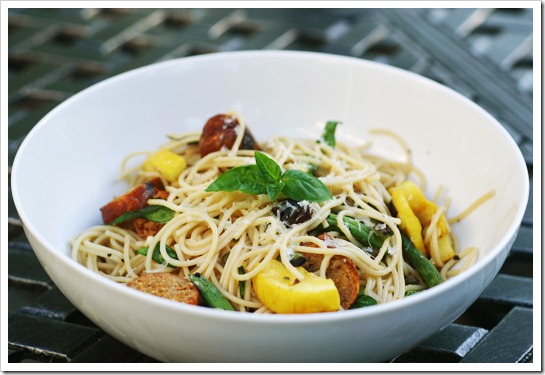
I love keeping tabs on Cara's blog for great healthy recipe ideas, tips, and tricks. Last week this recipe came up, and seemed perfect for us since we had lots of basil, summer squash, and green beans to use up! I wanted to add a grain to the dish, and ended up going with our favorite pasta - Barilla Plus (that stuff is awesome). This result was a fantastic dinner - bright from the touch of lemon, with plenty of briney goodness from the olives and capers (I found that it didn't need any additional salt). As an added bonus - it was quick to throw together, with the pasta cooking in the same time as the sausages and vegetables.

IMG_0006c

Grilled Sausage with Olives, Capers, and Summer Vegetables
Slightly adapted from Cara's Cravings

1 pound summer squash, halved lengthwise and sliced
3/4 pound fresh romano beans or green beans, cut into 1 - 1 1/2" pieces
1 pound (4 links) Italian turkey or chicken sausage
about 1/3 cup chopped basil
4 ounces pitted Kalamata olives, cut in half
1 tablespoon capers
juice of 1 lemon
8 ounces of your favorite pasta
1/4 cup freshly grated parmesan cheese

Preheat grill to medium-high heat.

Combine the sliced squash and beans on a baking sheet. Spray with olive oil cooking spray and season with salt and pepper. Also spray the sausages with cooking spray.

Place the vegetables in a grill basket and the sausages right on the grill. If you are using pre-cooked sausages, you won't need to leave them on their very long. Just grill until they are hot throughout and have some nice grill marks. For uncooked sausages, cook for about 20 minutes, turning occasionally, until cooked through and browned. Stir the vegetables every so often, until crisp-tender and lightly charred and beginning to caramelize in spots.

Meanwhile, chop the basil and slice the olives and add both to a large bowl. Also, cook pasta according to the package directions, and reserve about 1 cup of pasta water before draining pasta.  When the sausage is done, let it rest for a few minutes and then slice into 1" chunks. Add the sausage pieces, vegetables, cheese, and pasta to the bowl with the basil and capers. Squeeze the lemon juice over everything, toss, and add pasta water a little at a time to achieve desired consistency.  Season to taste with salt and pepper. Serve warm.

Friday, August 20, 2010

Chewy, Chunky Blondies

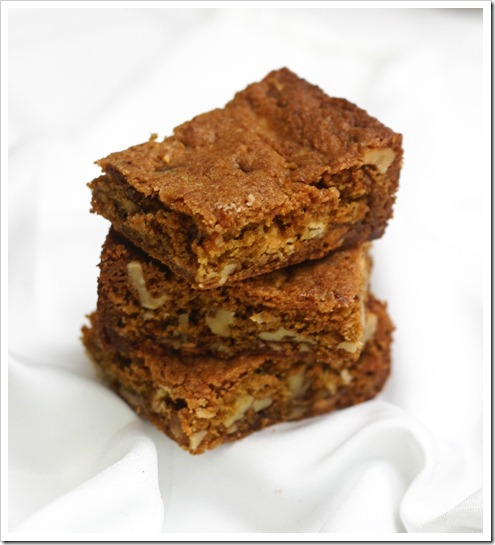
I much prefer blondies to regular brownies. It's likely because I'm just not that big of a chocolate person. I had a craving for blondies and went straight to Dorie Greenspan for my fix. It has been a while since I've made anything from her book, since I left TWD in late 2008 (wow, was it that long ago?). I figured I was due for some quality time with Dorie. 
IMG_0093c
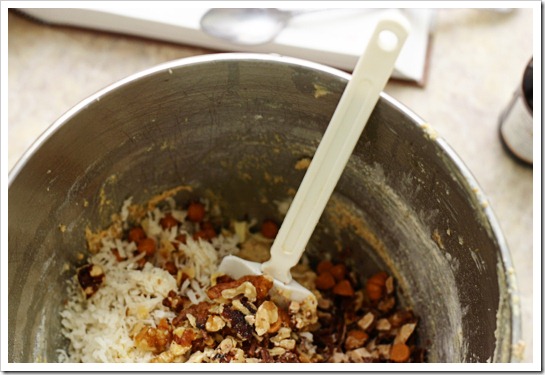
I was feeling pretty confident that there were a few ingredients I could change without screwing up the final results, and I was right! The Earth Balance butter, sucanat, evaporated cane juice and whole wheat pastry flour all played their parts flawlessly. These are a wonderful treat that I could feel a little less guilty about... until adding a scoop of ice cream, that is!

IMG_0106c

Chewy, Chunky Blondies
Source: Slightly adapted from Dorie Greenspan, Baking: From My Home to Yours p.109

2 cups whole wheat pastry flour
3/4 teaspoon baking powder
1/2 teaspoon baking soda
1/2 teaspoon salt
2 sticks (8 ounces) Earth Balance butter, at room temperature
1 1/4 cups sucanat
1/4 cup evaporated cane juice
2 large eggs
1 teaspoon pure vanilla extract
6 ounces bittersweet chocolate, chopped into chips, or 1 cup store-bought chocolate chips
1 cup butterscotch chips or Heath Toffee Bits
1 cup coarsely chopped walnuts

Getting Ready: Center a rack in the oven and preheat the oven to 325 degrees F. Prepare a 9×13-inch baking pan with baking spray and put it on a baking sheet.

Whisk together the flour, baking powder, baking soda and salt.

Working with a stand mixer, preferably fitted with a paddle attachment, or with a hand mixer in a large bowl, beat the butter on medium speed until smooth and creamy. Add both sugars and beat for another 3 minutes, or until well incorporated. Add the eggs one by one, beating for 1 minute after each addition, then beat in the vanilla. Reduce the mixer speed to low and add the dry ingredients, mixing just until they disappear into the batter. Using a rubber spatula, stir in the chips and nuts. Scrape the batter into the buttered pan and use the spatula to even the top as best you can.

Bake for about 40 minutes, or until a knife inserted into the center of the blondies comes out clean. The blondies should pull away from the sides of the pan a little and the top should be a nice honey brown. Transfer the pan to a rack and cool for about 15 minutes before turning the blondies out onto another rack. Invert onto a rack and cool the blondies to room temperature right side up.

Cut into 32 bars, each roughly 2-1/4 x 1-1/2 inches.

Wednesday, August 18, 2010

Zucchini Muffins

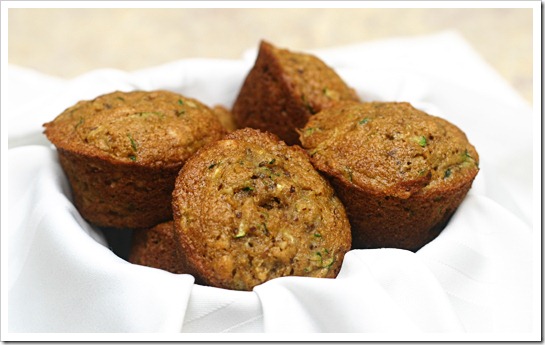
I have always loved my mom's zucchini bread recipe, and looked forward to it every summer when there was a surplus of zucchini in the house. Now that I have my very own surplus, I can make it for myself!  Of course I wasn't about to let it go by unaltered, as I thought there were a few places that I could significantly clean up the recipe to make it more healthy.

After making a few batches, a friend mentioned how blueberries are fantastic in zucchini muffins/bread, so I picked some up to try. Seriously--they are awesome. I didn't grab a picture of the blueberry version, but it is SO worth making! I've been freezing the muffins and then taking one to work each day to enjoy with my morning cup of tea - it's perfectly defrosted by the time I'm ready for it.

IMG_0043c

Zucchini Muffins
Source: Adapted from a recipe received from my mom
Yield: 2 loaves or 16-20 muffins
  • 1 cup unsweetened applesauce
  • 1 1/2 cups evaporated cane juice (such as bob's red mill)  
  • 4 eggs
  • 1 teaspoon vanilla extract
  • 1 teaspoon ground cinnamon
  • 3 1/2 cups whole wheat pastry flour
  • 1 1/2 teaspoons salt
  • 3/4 teaspoon baking soda
  • 2 cups grated zucchini (not peeled, but gently squeezed to remove excess moisture)
  • 1 cup chopped walnuts (optional)
  • 1 cup blueberries (optional but highly recommended!)
Preheat oven to 350 degrees F.  Prepare two loaf pans or two muffin pans with baking spray. 

Add applesauce, sugar, eggs, and vanilla extract to a bowl and mix with hand or stand mixer until combined. 

In a separate bowl, combine flour, cinnamon, salt, and baking soda and whisk to evenly distribute ingredients. 

Slowly add flour mixture to wet ingredients and mix on low speed with a stand mixer, or by hand until all the flour is incorporated. 

Gently fold zucchini, walnuts and blueberries into batter.  Pour batter evenly into loaf pans, or scoop about 1/3 cup batter into each muffin well in the muffin tins.  Bake loaf pans for 55 minutes, or muffin tins for 18-22 minutes.  Allow to cool in the pan on a wire rack. 

To freeze: wrap well with plastic wrap and store in a freezer bag. 

Monday, August 16, 2010

Summer Vegetable Gratin

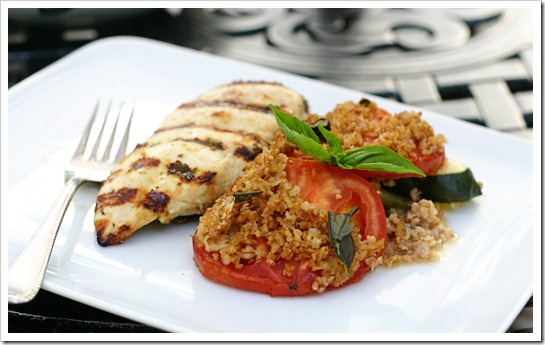
This recipe has been on my "to make" list for, well, two years now! I was finally inspired to make it by the abundance of zucchini from the garden. The original recipe calls for carmelized onions, but my husband isn't a huge fan of them. I decided that I'd swap them out for some bulgur, to add a little whole grain-y goodness to the dish.

IMG_0072c

We served this with lemon basil chicken. I loved the almost nutty flavor addition from the bulgur. This dish is a great way to use up those delicious garden vegetables!

Summer Vegetable Gratin
Source: Slightly adapted from Cook's Illustrated, July/August 2008
Serves: 6-8 as a side or 4 as a light main dish

  • 5 tablespoons extra-virgin olive oil
  • 1 pound zucchini, ends trimmed and sliced crosswise into 1/4-inch-thick slices
  • 1 pound summer squash (yellow), ends trimmed and sliced crosswise into 1/4-inch-thick slices
  • 2 teaspoons table salt
  • 1 1/2 pounds ripe tomatoes (3 to 4 large), sliced 1/4 inch thick
  • 3/4 teaspoon ground black pepper
  • 2 medium garlic cloves, minced or pressed through garlic press (about 2 teaspoons)
  • 1 tablespoon minced fresh thyme leaves
  • 1 cup cooked bulgur
  • 2 ounces Parmesan cheese, grated (about 1 cup)
  • 2 medium shallots, minced (about 1/4 cup)
  • 1/4 cup chopped fresh basil leaves
Adjust oven rack to upper-middle position and heat oven to 400 degrees. Brush 13- by 9-inch baking dish with 1 tablespoon oil; set aside.

Toss zucchini and summer squash slices with 1 teaspoon salt in large bowl; transfer to colander set over bowl. Let stand until zucchini and squash release at least 3 tablespoons of liquid, about 45 minutes. Arrange slices on triple layer paper towels; cover with another triple layer paper towels. Firmly press each slice to remove as much liquid as possible.

Place tomato slices in single layer on double layer paper towels and sprinkle evenly with 1/2 teaspoon salt; let stand 30 minutes. Place second double layer paper towels on top of tomatoes and press firmly to dry tomatoes.

Combine garlic, 3 tablespoons oil, remaining 1/2 teaspoon pepper, and thyme in small bowl. In large bowl, toss zucchini and summer squash in half of oil mixture, then arrange in greased baking dish. Sprinkle 1/2 cup bulgur evenly over squash. Slightly overlap tomato slices in single layer on top of bulgur. Spoon remaining garlic-oil mixture evenly over tomatoes. Bake until vegetables are tender and tomatoes are starting to brown on edges, 40 to 45 minutes.

Combine remaining bulgur, remaining tablespoon oil, Parmesan, and shallots in medium bowl. Remove baking dish from oven and increase heat to 450 degrees. Sprinkle mixture evenly on top of tomatoes. Bake gratin until bubbling and cheese is lightly browned, 5 to 10 minutes. Sprinkle with basil and let sit at room temperature 10 minutes before serving.

Wednesday, August 11, 2010

Zucchini Pancakes

I am super excited and nervous to have our own garden growing this year. I wasn't sure if it would do well, but everything is growing like crazy! As a result, we have plenty of zucchini, so I went off in search of interesting things to make with it. I culled a couple of zucchini pancake recipes for inspiration: one from Ina Garten since I completely trust her, and one with such a raving review that I just had to incorporate it. The result, combined with fresh garden tomatoes, was an absolutely delicious breakfast that my husband wanted nothing to do with. I was quite ok with that - more for me!

IMG_0052c

Zucchini Pancakes
Source: Adapted from All Eyes on Jenny and Ina Garten

1 1/2 cups zucchini, grated and squeezed to remove excess moisture
2 Tablespoons grated  red onion
1/4 cup grated Parmesan cheese
6-8 tablespoons flour
2 eggs, lightly beaten
2 tablespoons mayo
1/4 teaspoon oregano
1 teaspoon kosher salt
1/2 teaspoon freshly grated black pepper
1 tablespoon butter

Mix all ingredients, except butter, together in a large bowl.  Heat a non-stick pan over medium heat.  Add butter to pan and allow to melt, spreading over the surface of the pan.  Drop about 1/4 cup of batter into pan for each pancake, flatten and cook until golden on each side. Served topped with tomato slice and more cheese.

Monday, August 9, 2010

Barbecue Chicken Burgers

This summer we moved to a relatively rural area, and I was excited about that because I knew there would be great opportunities for a variety of fresh, locally grown produce. I couldn't wait for the Farmer's Market to start up in June, and I've been loving the things I find there.

One of my favorite stands is Wayne's Organic Garden. Attaining organic certification from the USDA is no small task, and on my first visit to the stand I let them know how much I appreciated the effort they put into maintaining their farm.

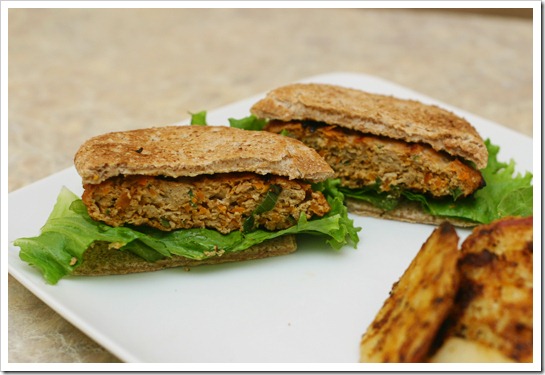
On one recent trip, they had gorgeous bunches of green onions that I couldn't pass up. I knew I wanted to make something with them as soon as I got home, to enjoy the fresh onion flavor. We already had planned on burgers that day, so I did a quick search and found this recipe for barbecue chicken burgers that sounded delicious. I liked that it incorporated another vegetable (carrots) right into the burger! A great way to get a few more vegetables in our diet.

IMG_0081c

We really enjoyed the contrasts in these burgers between the smokey, spicy cayenne and chili sauce against the sweet molasses. These are unique burgers that are worth a try!

Barbecue Chicken Burgers
Source: Good Housekeeping via The Daily Green

  • 1 pound ground chicken breasts
  • 1 medium carrot, grated (1/2 cup)
  • 2 green onions, minced
  • 1 garlic clove, crushed with garlic press
  • 2 tablespoons chili sauce
  • 1 tablespoon light (mild) molasses
  • 2 teaspoons cayenne pepper sauce
  • 2 teaspoons Worcestershire sauce
  • 1/4 teaspoon salt
  • 4 hamburger buns, warmed
  • Sliced cucumber, lettuce leaves and green onion (optional)
1. In medium bowl, with hand, mix ground chicken, carrot, green onions and garlic until evenly combined.

2. On waxed paper, shape chicken mixture into four 3 1/2-inch round patties (mixture will be very soft and moist).

3. Place patties on grill over medium heat and cook about 12 minutes or until juices run clear when center of burger is pierced with tip of knife, turning over once. (If you have a grill with widely spaced grates, you may want to place burgers on a perforated grill topper to keep them intact.)

4. Place burgers on warmed buns. Serve with cucumber slices, lettuce leaves and green onions if you like.

Wednesday, August 4, 2010

Butterscotch Pudding Pops

Fudgsicles have been a bit of an obsession for me this summer.  Perhaps it's the unusual heat we've had, but I have been drawn like a magnet to this frozen treat.  Well, my world came crashing down this past weekend when I went to the store and they were out of fudgsicles

I thought, hey, this is no big deal.  There is a store brand fudge pop, so I'll just get those.   BIG mistake.  The store brand fudge pops are inedible.  Completely disgusting.  They are almost... salty.  I was very upset by all of this.

IMG_0119c
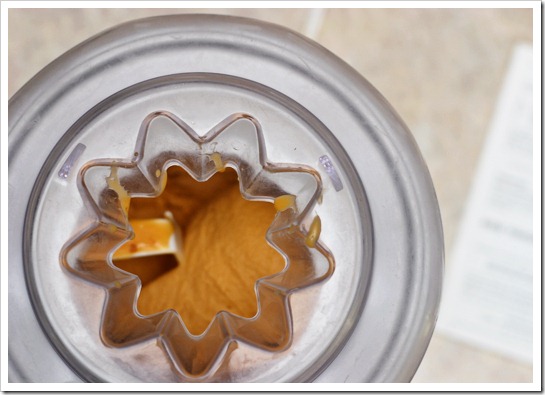
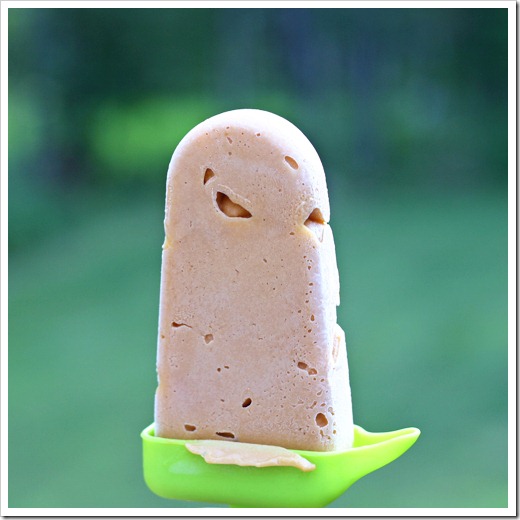
Thankfully, I didn't have to be upset for long.  I was putting away some cookbooks, and among them was the small booklet that came with my ice cream maker.  A quick flip through the book presented a possible alternative - make my own fudgsicles!  I immediately went to the pantry in search of pudding mix.  I didn't even care that this was basically a semi-homemade/convenience recipe; I wanted my fudgsicles.  All I ended up having in the pantry was a package of butterscotch pudding, but I figured that butterscotch pudding pops sounded good, anyway.  I mix up the batter and churned away.  20 min later I filled my popsicle molds and put them in the freezer, hoping for the best.


IMG_0121c
My fears that they would come out rock hard or icy were unfounded.  They are perfect!  Cool, creamy, delicious.  Next up?  Skip the pudding mix and go straight to my favorite chocolate pudding recipe.  I hope it turns out just as well!

Any Flavor Pudding Pops
Source: Slightly adapted from Cuisinart ICE-20 Recipe booklet

2 packages (3.4-3.9 ounces each) of your favorite instant pudding flavor
3 cups cold 2% milk

Place ingredients in a medium mixing bowl and whisk until well blended.  Freeze according to manufacturer's ice cream maker instructions.  Transfer to popsicle molds, and freeze until firm.