Monday, June 11, 2012

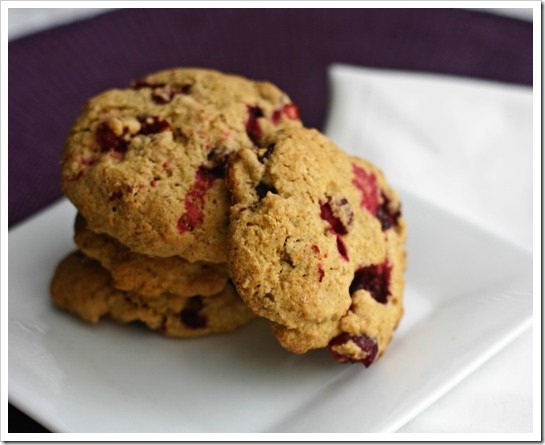
Cranberry Orange Pecan Cookies

Every fall I stock up on fresh cranberries. It's the only time of year you can get them, and I love to bake with them. Last fall I got 6 or 7 bags and tossed them in the freezer.

Guess what? They are all still there.

I never got around to doing anything with them over the winter (for shame), so I figured there's no time like the present!
IMG_0083c
These cookies are soft, which I love. They are sweet enough to balance the tart cranberries, and have a little hint of citrus from the orange zest. Pecans add the perfect crunch. Still have some cranberries kicking around in your freezer? Make these today!
Cranberry Orange Pecan Cookies
Cranberry Orange Pecan Cookies Source: Adapted from Short and Sweets
Yield: 30 cookies
Ingredients
  • 1/2 cup vegan butter
  • 3/4 cup evaporated cane juice
  • 1/2 cup sucanat
  • 1/4 cup orange juice
  • zest from one medium orange
  • 2 eggs
  • 1 teaspoon pure vanilla extract
  • 3 cups whole wheat pastry flour
  • 1 teaspoon baking powder
  • 1/4 teaspoon baking soda
  • 1 cup chopped pecans
  • 2 cups cranberries, chopped or whole
Instructions
  1. Preheat your oven to 375 degrees F. Grease or line cookie sheets.
  2. In a large bowl, cream together butter and sugars. Add the orange juice and zest. Add the eggs, one at a time, then the vanilla extract.
  3. In a medium bowl, whisk together the flour, baking powder, and baking soda. Slowly mix flour into the batter. Add the pecans and cranberries, mix until just combined.
  4. Using a spoon and your fingers or a cookie scoop, form rough balls of dough (approximately 2 tablespoons) and place them on your prepared cookie sheet.
  5. Bake for 12-17 minutes, until the edges are slightly brown. Let cookies cool on the sheet for a few minutes before transferring to wire racks to cool completely

Monday, June 4, 2012

Root Beer Float Brownies

It’s no secret around here that I love ice cream.  Since cracking open my ice cream maker several years ago, I’ve purchased ice cream from the store only a handful of times.  Lately, I’ve been finding that the store bought stuff just doesn’t live up to what I make at home.  It just tastes… off.  But, I digress…
IMG_0118c
Since ice cream is and always has been my favorite dessert, I’m no stranger to the various applications of ice cream in the dessert world.  Root beer floats are an excellent use of ice cream, and a great way to jazz up the plain vanilla variety.  Although, I have to admit – growing up, my favorite combination was actually ginger ale and vanilla ice cream.  They are great together!
IMG_0121c
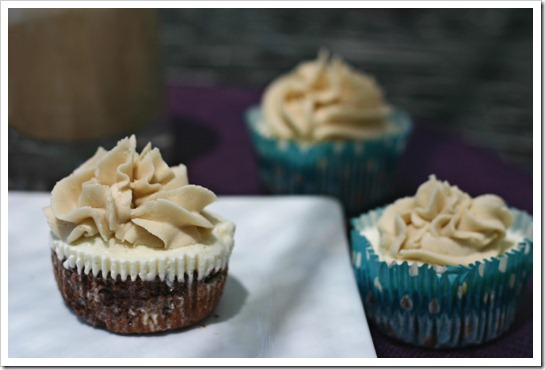
I saw these brownies and knew I had to make them for the nostalgia factor.  I didn’t see how I could just leave it as a brownie and frosting, though – what’s a root beer float without ice cream??  The result is a delicious frozen treat, perfect for the summer.  In full disclosure, I actually found these to taste very little like root beer.  A disappointment, for sure, and in the future I will have to seek out the root beer extract to give the frosting a kick.  
Root Beer Float Brownies
Root Beer Float Brownies Source: Slightly adapted from Coffee and Cannolis
Yield: 30 ice cream brownies
 
 
Ingredients
For the brownies:
  • 2/3 cup flour
  • 2 cups cocoa powder
  • 1/2 teaspoon salt
  • 6 oz. chopped semi sweet chocolate
  • 3 oz. chopped white chocolate
  • 4 tbsp. butter
  • 3 large eggs
  • 1/2 cup white sugar
  • 1/2 cup brown sugar
  • 2 tsp. vanilla
  • 8 oz. root beer
For the filling and frosting:
  • 1 quart vanilla ice cream
  • 1 cup unsalted butter, at room temperature
  • 1/2 cup root beer,simmered until reduced to 1/4 cup
  • 5 cups powdered sugar
  • 1/2 tsp root beer extract (optional)
Instructions
  1. Preheat oven to 375 degrees F. Line muffin tins with paper liners.   
  2. Sift flour, cocoa powder and salt in a bowl and set aside. 
  3. Over a double boiler (or in microwave) melt the butter, semi-sweet and white chocolates together.  Remove from heat when just melted and allow to cool for 5 minutes.
  4. Using your mixer mix the eggs, sugars and vanilla together.  Slowly add in the cooled chocolate mixture.  Add half the flour and half the root beer. Mix on low, scraping the sides. Repeat with the remaining flour and root beer until just combined. Batter will be very thin.
  5. Pour batter into your muffin tins, filling each about halfway.  Bake about 15 minutes, until the center is just set.  Let cool completely.
  6. Let ice cream sit out to soften while brownies cool.  Once cooled, fill liners with ice cream.  Place in the freezer for at least 30 minutes. 
  7. Meanwhile, prepare frosting.  Beat butter on medium speed until smooth. Slowly add in your powdered sugar and mix in.  Add concentrated root beer and extract, if desired. Beat on medium until smooth and all ingredients are incorporated.
  8. Frost cupcakes, then store in the freezer until serving. 

Thursday, May 17, 2012

Cheesecake-Style Lime Squares

My husband is not a sweets guy. Once in a while he'll eat cheesecake, caramel brownies, and he loves peanut butter ice cream, but other than that, you are hard pressed to get him to eat dessert. When the latest Clean Eating magazine arrived in the mail, I saw this recipe for cheesecake style lime squares and knew they would be right up his alley. Since they were from CE, I knew they wouldn't be too sweet. And lime + cheesecake is a match made in his heaven.

IMG_0011C

These definitely lived up to our expectations, and he loved them! The lime adds a bright flavor to the tangy cheesecake base, and I was right - they aren't too sweet. Just perfect for us.
Cheesecake-Style Lime Squares
Cheesecake-Style Lime Squares Source: Slightly adapted from Clean Eating Magazine, June 2012, page 39
Yield: 16 squares
Preparation time: 20 minutes
Total time: 1 hour, 10 minutes, plus 8 hours to chill
 
Ingredients
  • 14 all natural whole-wheat graham cracker squares (or 7 rectangular sheets)
  • 3 tablespoons organic unsalted butter, melted
  • 8 ounces light cream cheese
  • 1 cup low-fat sour cream (or plain greek yogurt)
  • 1/2 cup organic evaporated cane juice
  • 1 tablespoon lime zest (from about 2 limes), plus additional for garnish
  • 1/4 cup fresh lime juice (about 2 limes)
  • 1 large egg
Instructions
  1. Preheat oven to 350 degrees F. Line an 8 inch square baking dish with parchment paper, leaving 2 to 3 inches hanging over 2 opposing sides.
  2. In a food processor, process graham crackers into fine crumbs.  With machine running, pour butter through feed tube and process until just combined, 2 to 3 seconds.  Transfer mixture to baking dish and press into bottom with your hands to form an even layer.  Bake until edges are very light brown, about 9 minutes.  Transfer to wire rack. 
  3. Reduce oven temperature to 325 degrees F.  Wipe out food processor  and add cream cheese and sour cream or yogurt; process until smooth, about 1 minute.  Add cane juice and lime zest and juice.  Pulse, stopping to scrape down the sides of the bowl as needed, until combined.  Add egg and pulse until just combined.  Spread mixtures evenly over top of graham cracker crust and bake until edges are just set and center is still moist and slightly jiggly, 38 to 40 minutes. 
  4. Transfer to wire rack and let rest for 10 minutes.  Run a thin knife along the edges of dish to loosen.  Let cool to room temperature.  Cover loosely with plastic wrap or foil and refrigerate for 8 hours or overnight.  Transfer cheesecake to cutting board by lifting edges of parchment.  Garnish with additional lime zest and slice into 16 squares.  Serve chilled.  After slicing, squares will keep refrigerated for 1 day. 

Monday, April 16, 2012

Cooking Challenge: French Macarons

French Macarons! The temperamental, yet adored, cookie is a cooking challenge that many home bakers one day aspire to make. A group of fellow food bloggers decided to conquer this cookie together, so we could share our questions, successes, and tales of woe. See the round-up here!

In my search for macaron recipes, I came across some adorable Easter bunny macarons, and instantly knew that was what I wanted to make. I kept the flavoring simple - vanilla bean, and let the caramel buttercream from my Glee cupcake pull double duty for the filling.

IMG_0030c

This was definitely a learning experience for me. I was so happy that, by all appearances, everything went well with the macarons: they have feet and for the most part they did not stick to the parchment. Going through the process of making them, I had a few concerns that I will pay more attention to if I make them again.

First, I think I would have benefited from sifting the almond meal/powdered sugar mix. When I added it to the egg whites, the batter was very lumpy. I had to do a lot of folding/mixing to get it smooth, and I think by then I had deflated it too much and the batter was more runny than it should have been (though it wasn't flowing like ribbons, either, so all around it was a little confusing). It probably would have been fine for just piping rounds, but the ears require a thicker batter to stay separate, and clearly my poor bunnies ended up with uni-ears.

I also think that I under baked the bunny faces by maybe a minute. In hindsight, I should have put all the faces on one sheet and the rounds on another. The rounds didn't need as long as the faces and a little extra time in the oven would have helped the faces that were reluctant to release from the parchment.

Sadly, after all that, I was a bit underwhelmed with them. I've never had macarons before, so perhaps I need to taste some made by someone who actually knows what they are doing, but I felt very take-it-or-leave-it. However, my aunt ate three of them at Easter, so I must have done something right.

IMG_0032c

Vanilla bean bunny macarons with caramel swiss meringue buttercream were a fun addition to our Easter dinner!


Vanilla Bean French Macarons with Caramel Swiss Meringue Buttercream

Vanilla Bean French Macarons with Caramel Swiss Meringue ButtercreamSource: Adapted from Annie's Eats and inspired by Raspberri Cupcakes
Yield: About 12 bunnies
Preparation time: 20 minutes, plus one hour resting time
Cook time: 12-18 minutes
Total time: 1 hour 40 minutes

Ingredients

  • 110 grams almonds (blanched or slivered), or almond meal
  • 200 grams powdered sugar
  • 100 grams egg whites (about 3 large eggs), aged at room temperature for 12-24 hours or in the fridge for 3-5 days
  • 1 vanilla bean, split lengthwise
  • 1/4 teaspoon vanilla extract
  • 50 grams granulated sugar
  • 50 grams granulated sugar
  • chocolate sprinkles, sugar pearls, and foodwriter pen for decorating
  • caramel swiss meringue buttercream

Instructions

  1. Pulse the almonds and powdered sugar in the bowl of a food processor until finely ground and well blended. In the bowl of a stand mixer fitted with the whisk attachment, whip the egg whites on medium-high speed until foamy. Scrape the seeds from the vanilla bean pod into the mixing bowl. Gradually add the granulated sugar and continue beating until a smooth, shiny meringue with stiff peaks forms. Blend in the vanilla extract, if using.

  2. Add the ground almond mixture to the bowl with the meringue and quickly but gently fold together using a wide rubber spatula until no streaks remain. You want to achieve a thick batter that ribbons or flows from the spatula when lifted.

  3. Line two baking sheets with silicone baking mats or parchment paper. Transfer the batter to a piping bag fitted with a plain wide round tip. Pipe into small rounds on the prepared baking sheets (each round should be about 1-1½ inches in diameter, with 12 rounds on one sheet and 12 rounds with bunny ears on another), spaced about 1 inch apart. Add sugar pearls for nose and tails (I used a cluster of about 7 to make a tail), and sprinkles for whiskers. Let sit at room temperature for about an hour to develop a hard shell.

  4. Preheat the oven to 300˚F. Bake for 12-18 minutes, depending on size. (Baking time can vary widely due to humidity and other factors of your kitchen environment. To test whether or not the cookies are done, let cool for a minute until cool enough to touch. Carefully attempt to remove one shell from the silpat. If it cracks at all or does not remain intact, continue to bake until one is removed intact.) Transfer the pans to a wire cooling rack and let cool completely before moving the cookies. Draw eyes on bunnies with foodwriter pen.

  5. Pipe a small dollop of buttercream onto the flat side of one cookie of each pair. Sandwich together with the remaining cookie, pushing the filling to the edges. Store in the fridge overnight in an airtight container. Serve at room temperature


    Tuesday, April 10, 2012

    Glee! Banana Nut Cheerio Cupcakes


    I am so excited that Glee is returning tonight after the late winter break. Last episode left us hanging on the fate of Quinn after her car accident, so I wanted to make Quinn's cupcake for this week.


    IMG_0009c

    It would be an understatement to say Quinn has had a few ups and downs in her time at McKinley High. Her fall from high atop the Cheerios (and school popularity) pyramid due to her teen pregnancy sent her into a bizarre downward spiral in season 3. An attempt to sabotage the custody rights of her daughter's adoptive mother was definitely b-a-n-a-n-a-s. Inspired by A) Quinn's nutty behavior and B) the many flavors of Cheerios cereal, I created Quinn's cupcake.

    IMG_0015c

    I am definitely glad to see that she was able to come full circle in the last episode and regain the status she has longed for: to once again be a Cheerio.

    IMG_0022c

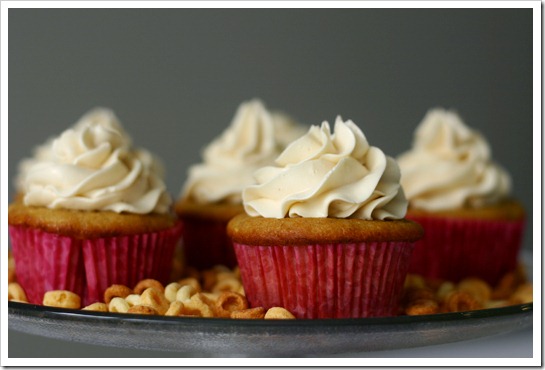
    Quinn's Banana Nut Cheerio cupcake combines cinnamon banana cake with a Cheerio covered peanut butter center, and is topped with caramel swiss meringue buttercream.
    Banana Nut Cheerio Cupcakes

    Banana Nut Cheerio Cupcakes

    Source: Adapted from Apple a Day
    Yield: Serves 24
    Preparation time: 25 minutes
    Cook time: 20 minutes
    Total time: 2 hours, 45 minutes (with cooling time)

    Ingredients
      For the cupcakes:
    • 3/4 cup unsalted butter, at room temperature
    • 3 eggs, at room temperature
    • 2 cups all-purpose flour
    • 1 1/2 teaspoons baking powder
    • 3/4 teaspoon salt
    • 1/4 teaspoon baking soda
    • 1 teaspoon cinnamon
    • 1/2 mashed overripe banana (1 large)
    • 3/4 cup buttermilk
    • 1 teaspoon vanilla extract
    • 1 scant cup sugar

    • For the filling:
    • 2/3 cup powdered sugar
    • 1/2 cup creamy peanut butter
    • 2 tablespoons unsalted butter, at room temperature
    • 1/4 teaspoon vanilla extract
    • 1 1/2 cups crushed peanut butter Cheerios cereal

    • For the buttercream:
    • 8 ounces egg whites (from a carton is fine)
    • 12 ounces sugar
    • 1 1/4 cups unsalted butter, at room temperature
    • 1 teaspoon vanilla extract
    • 3 tablespoons caramel sauce


    Instructions
      For the filling:
    1. In bowl, with mixer on medium speed, mix powdered sugar, peanut butter, butter, and vanilla until blended.
    2. Shape mixture into 24 balls using heaping measuring teaspoons. (Balls will be sticky and don't need to be perfectly shaped.)
    3. Roll in crushed Cheerios cereal. Place balls on waxed paper-lined cookie sheet; set aside.

      For the cupcakes:
    1. Preheat oven to 350 degrees Fahrenheit. Line a muffin tin with 24 paper liners.
    2. In a large mixing bowl, beat butter on medium speed for 30 seconds. Add sugar, 1/4 c. at a time, beating on medium speed until light and fluffy and scraping down sides of bowl. Add eggs, one at a time, scraping down sides of bowl after each addition.
    3. In a medium bowl, stir together flour, baking powder, salt, baking soda, and cinnamon.
    4. In a small bowl, combine banana, buttermilk, and vanilla.
    5. Add in flour and banana mixtures, beginning and ending with the flour, and mix on low speed until just combined.
    6. Fill muffin cups 2/3 full. Insert a Cheerio covered peanut butter ball into the center of the cupcake and push down to cover with batter. Bake for 18-20 minutes or until a toothpick inserted in the middle comes out clean.
    7. Allow to cool completely, then frost with buttercream.

      For the buttercream:
    1. Add egg whites and sugar to a heat-safe bowl. Place bowl over a pot of simmering water and whisk lightly until the mixture reaches 140 degrees F and the sugar is dissolved.
    2. Pour hot whites into a room-temperature bowl and whip with a wire whip until double in volume on medium-high speed. When the mixer stops, the meringue should not move around in the bowl. Meanwhile cut up butter into 2-inch pieces. (The butter should be slightly moist on the outside but cold inside.)
    3. On your mixer, remove the whip and attach the paddle. Add half the butter into the bowl immediately and pulsate the mixer several times until the meringue has covered the butter completely. To pulsate the mixer, turn it on and off in a jerky motion. This forces the butter on the top to the bottom of the bowl. Add the balance of the butter and pulsate mixer several times. Slowly increase the mixer's speed, starting with the lowest speed and increase the speed every 10 seconds until you reach a medium-high speed.
    4. Continue beating until the mixture begins to look light and fluffy. Stop the mixer and scrape the bowl. Reduce speed to low. Add vanilla and caramel and continue to beat on low speed for 45 seconds. Then beat on medium-high speed for an additional 45 to 60 seconds.
    5. Leftover buttercream can be placed in plastic containers with lids and kept in the freezer for up to 3 months. Defrost completely (several hours) and rewhip before using.


      Thursday, April 5, 2012

      Slow-Cooker Honey Sesame Chicken

      I've come to the realization that I don't make enough use of my crockpot. I tend to make the same few easy recipes over and over. Part of the reason, I think, is that I tend to think of the crockpot as something to use during the week to save time. I load it up at night, cook overnight, and then pack the food up for lunch and take it to work. Since I only have the morning to complete the last steps of the meal, I tend to make recipes that go right from crockpot to plate with little other necessary intervention. It's always seemed like cheating to use the crockpot on the weekend, since I actually have time to prepare a "real meal." I'm slowly coming to realize that crockpot meals are real meals, too, and it can be quite freeing to make them on the weekend! This is one recipe that caught my eye recently (along with another I'll be sharing soon - chicken tacos), and helped me reclaim a little time on a busy weekend afternoon.

      IMG_0039c

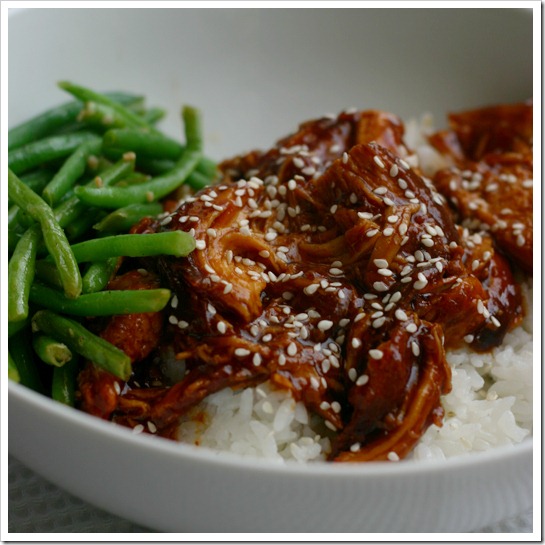
      Enjoy this sweet and slightly spicy easy slow-cooker meal!
      Slow Cooker Honey Sesame Chicken
      Slow Cooker Honey Sesame ChickenSource: Slightly adapted from The Dainty Chef
      Yield: Serves 4
      Preparation time: 5 minutes
      Cook time: 4 hours
      Total time: 4 hours, 15 minutes

      Ingredients
      • 4 boneless skinless chicken breasts
      • salt and pepper
      • 3/4 cup honey
      • 1/4 cup soy sauce
      • 1/2 cup diced onion
      • 1/4 cup ketchup
      • 2 tablespoons safflower oil
      • 2 cloves garlic, minced, pressed or grated
      • 1/4 teaspoon red pepper flakes
      • 4 teaspoons cornstarch
      • sesame seeds
      Instructions
      1. Season both sides of chicken with lightly with salt and pepper, put into crock pot.
      2. In a small bowl, combine honey, soy sauce, onion, ketchup, oil, garlic and pepper flakes. Pour over chicken.
      3. Cook on low for 3-4 hours or on high 1 1/2 – 2 1/2 hours, or just until chicken is cooked through. Remove chicken from crock pot, leave sauce.
      4. Dissolve cornstarch in 6 tablespoons of water and pour into crock pot. Stir to combine with sauce. Replace lid and cook sauce on high for ten more minutes or until slightly thickened.
      5. Shred chicken or cut into bite size pieces, then return to pot and toss with sauce. Serve chicken over rice or noodles, garnish with sesame seeds.


        Thursday, March 29, 2012

        One Pot Meal: Spicy Asian Chicken and Rice

        We are slightly unorthodox when it comes to meals during the week. We tend to have a bigger lunch (and several smaller meals through the day) and no formal dinner. We prefer not to have a large meal at the end of the day, and there isn't much time for me to cook at night, anyway. I do cook dinner on the weekends, but we try to be sitting down to eat by 5 or 5:30pm. This was a meal I'd planned for a Sunday night, but when my husband ended up having to work, and I had an exhausting day chasing our son around, I pushed it off until Monday.

        IMG_0004c
        I was so happy to see how quickly this dish came together while our son had his dinner, and my husband was able to finish it off while I put our son to bed. I was really impressed with how flavorful the dish is - though it didn't end up being very spicy for us. You may want to leave in the jalapeno seeds or add some cayenne to the chicken if you want an extra burst of spice.

        IMG_0006c

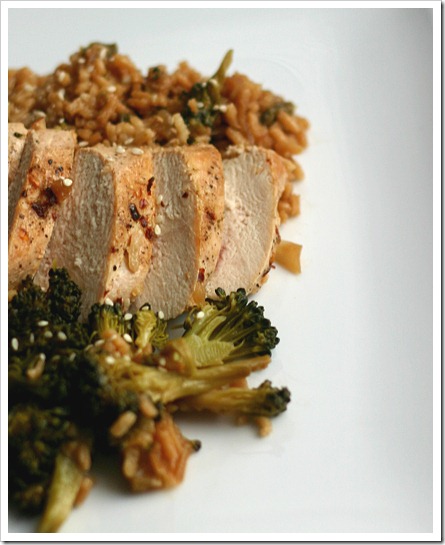
        This quick one pot meal boasts a ton of flavor is easy enough for a busy weeknight.

        One Pot Meal: Spicy Asian Chicken and Rice

        One Pot Meal: Spicy Asian Chicken and Rice

        Source: Reworded from Mary Ellen's Cooking Creations
        Yield: Serves 4
        Preparation time: 10 minutes
        Cook time: 25 minutes
        Total time: 35 minutes

        Ingredients
        • 1 pound boneless, skinless chicken breasts
        • salt, pepper, and red pepper flakes
        • 1 small onion, diced
        • 2 cloves garlic, minced or grated
        • 1 teaspoon grated fresh ginger
        • 1 jalapeno, seeded and diced
        • 1 cup uncooked rice
        • 1 3/4 cups low sodium chicken broth
        • 1/4 cup low sodium soy sauce
        • 1 tablespoon hoisin sauce
        • 1 head broccoli, cut into florets
        • sesame seeds, optional
        Instructions
        1. Heat 1 tablespoon extra-virgin olive oil in a large saucepan or Dutch oven
        2. Season chicken with salt, pepper, and red pepper flakes; add to pan and cook 3 min per side. Transfer to a plate.
        3. Add onions, garlic, ginger, and jalapenos to pan; saute 3 minutes.
        4. Add rice, stir 1 min to toast the rice.
        5. Combine the broth, soy sauce, and hoisin in a small bowl or measuring cup; add to pan.
        6. Bring to a simmer, then lower heat, and return chicken to pan (nestled into the rice). Top with broccoli florets, cover and cook over low heat (make sure it's still lightly simmering) approximately 15 minutes or until rice and chicken are cooked through, and the liquid has absorbed.
        7. Garnish with sesame seeds, if desired.